Complete NodeJS App Setup on an AWS Lightsail VPS
August 06, 2019
In this post, we will explore how to set up a NodeJS app on Amazon’s Lightsail instance. We will also explore setting up a CircleCI job for a NodeJS project, use Nginx as a web server, setup SSL for the server, and allow a local machine to access the remote server.
Prerequisites
- AWS Lightsail instance
- AWS Route53 domain (not mandatory)
- CircleCI account
- Github repo for the NodeJS project.
Let’s begin!
Spinning up an instance
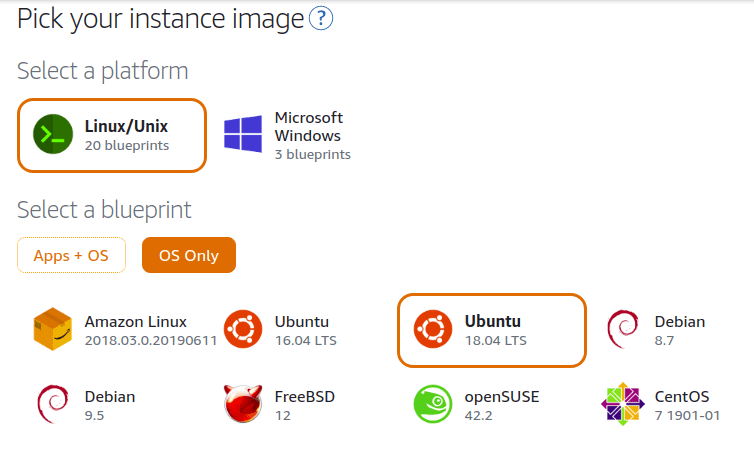
I have spun up a $5 instance with my account, it comes with 1 GB RAM, 1 vCPU, 40 GB SSD. Below is the image configuration I used while setting up the instance:
AWS Lightsail is configured to use a dynamic IP each time the server is restarted, a basic sudo reboot would give the server another IP address, we should configure a static IP for our server. This will save us the dynamic IP rotation.
Adding static IP to an instance
On the instance dashboard that you have created, click on the Network tab, then Attach static IP button.

It will toggle a select input to pick from existing static IPs that are not yet attached to an instance or create one. I have created one already so I only selected from the list, then the green button to confirm my selection. If you do not have one, enter a name for the IP then click on create button to create one, after which you can then attach to the instance.
Either way, we now have a static IP attached to our Lightsail server. Cool isn’t it?
Allowing SSH access from a local machine
AWS Lightsail comes with a web-based terminal that runs like a regular UNIX terminal. I do not feel at home with it, so, I will be setting up an SSH access for the instance. This will improve my productivity working with the VPS.
From the Lightsail home page, choose the instance you are working with, then click on the connect using SSH button.
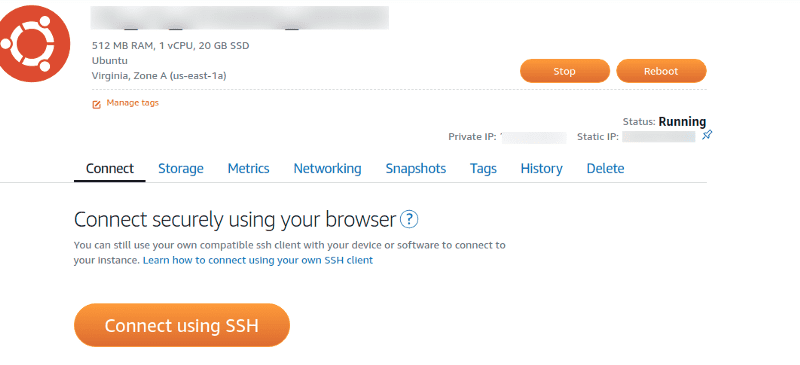
A new browser window should pop up, you should see:
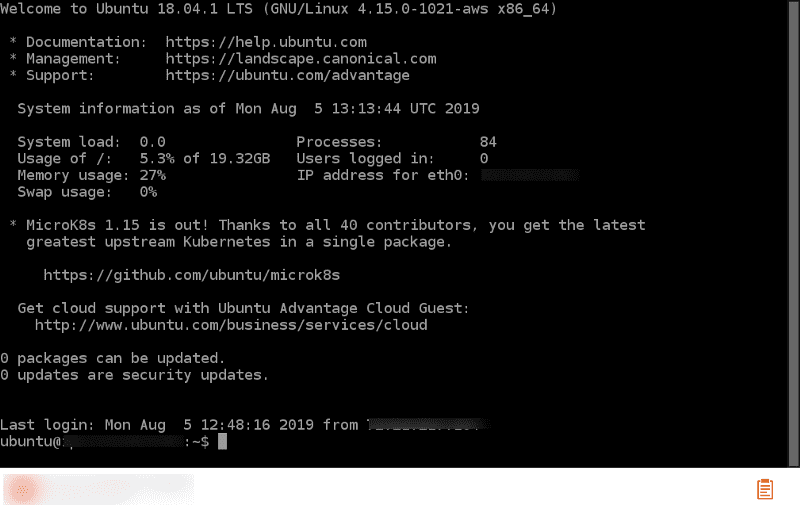
Next, from the command prompt run:
sudo nano ~/.ssh/authorized_keys
You should be greeted with a page containing default ssh key for your instance(more on this later). We will be adding our local machine’s public ssh key below the key already in the authorized_keys file.
From your local machine, create an ssh key or use an existing one. I am using an already existing one, the command below will copy my id_rsa.pub file to my clipboard.
xclip -sel clip < ~/.ssh/id_rsa.pub
Back in the web terminal, from the interface, there is a clipboard icon, click on it a text area should appear at the top of the icon. Click into the text box, then press Ctrl+V or Cmd+V to paste the contents from your local clipboard into the browser-based SSH client clipboard. Right-click any area on the SSH terminal screen to paste the text from the browser-based SSH client clipboard to the terminal screen. Easy, right?
To exit the edit window, press Ctrl+X, press Y to confirm the modification, and ENTER to complete the process.
Finally, reboot the server to reflect our changes:
sudo reboot
From our local machine’s terminal, we can run:
ssh ubuntu@LIGHT_SAIL_STATIC_IP
Replace LIGHT_SATIL_STATIC_IP with the static IP attached to your instance. If all goes well, you should be welcomed with the same message as the web terminal does. Well done!!!
Finally, for our AWS setup, we can go further to mask our static IP to a domain name. AWS Route53 can do that for us easily, I won’t be covering that here, you can look up this article for the process.
Installing NodeJS
To run our NodeJS code on the server, we need to install NodeJS runtime. I followed a tutorial from Tecadmin, here are the commands to do the installation:
sudo apt updatesudo apt install -y mongodbsudo systemctl enable mongodbsudo systemctl start mongodbsudo systemctl status mongodb
The last command should give a working systemd status with a green highlight:

Adding a new user account for deployment
To deploy your app, you will require a copy of your NodeJS app code on the server. It is a good practice to have a user account whose sole purpose is to serve your app.
To create a new user for your Ubuntu server, running the below command will create a new user dkapi it will also create a home directory for the user at /home/dkapi
sudo useradd -m -d /home/dkapi dkapi
Next, you should add a password for the user that you just created, the command below will prompt for a password to be used for dkapi.
sudo passwd dkapi
You should be able to run commands as sudo user with the newly created user account. The below command will allow that to be possible:
usermod -aG sudo dkapi
Now, you can switch to the user you just created with:
su - dkapi
Provide the password you entered when creating the account, you should find a prompt with a $_ sign, that’s a success. Cool!
Creating ssh keys for Github access
I followed the guide by Github to create an SSH key from here. Then, add the generated ssh to your Github account using the guide from here. Finally, we can test our Github SSH set up with the guide from here.
Pulling the NodeJS codebase from Github
We are here, you can now pull your NodeJS code from Github. This is basically cloning the repo, and this can be done easily with:
git clone GITHUB_SSH_URL ~/app
The repo will be cloned into ~/app directory
Follow the guide here to install Yarn on the instance, after that you can install the dependencies using yarn command.
Running NodeJS app in the background
For perfect integration with Nginx, you need to run your NodeJS app in the background. Packages like forever, pm2 gives this process a breeze. But, for me, I think using a systemd service is more appropriate, as I can start, stop and enable autostart of the service whenever the server is restarted. With the SSH access,systemd service has an edge over an npm package.
A systemd service are instruction files created at: /lib/systemd/system/ and the files are to end with .service extension. Full details about systemd can be found here. Let’s create one for ourselves.
Firstly, run sudo nano /lib/systemd/system/dkapi.service you can name dkapi.serviceanything, just ensure that it ends with a.service` as the file’s extension.
The content of the file should look like:
[Unit]Description=APP API ServiceAfter=network.targetStartLimitIntervalSec=0[Service]Type=simpleRestart=alwaysRestartSec=1User=dkapiExecStart=/usr/bin/node /home/dkapi/app/start.shWorkingDirectory=/home/dkapi/appStandardOutput=syslogStandardError=syslogSyslogIdentifier=dk-apiEnvironment= NODE_ENV=production[Install]WantedBy=multi-user.target
Attention should be paid to User=dkapi that should be the user account you created for the deployment, ExecStart=/home/dkapi/app/start.sh this is the start command for the service, basically calling an executable start.sh file. The file in my own case contains:
yarn start
Ensure that this file can be executed, use sudo chmod +x start.sh for this.
The WorkingDirectory=/home/dkapi/app should be the directory you pulled the files from Github into. And Environment= NODE_ENV=production to tell the environment variable you want the service to have.
Next, enter Ctrl+X then ENTER to save the file. Now, you have a service systemd that can be used to manage your NodeJS server instance.
- To enable the server to start when the server boots up we can do:
- To do systemctl enable dkapi
Now, we can manually start our service with:
sudo systemctl start dkapi
Greatness!!!
Installing Nginx webserver
NodeJS app only creates a local server, to accept request over the internet, we need a web server that will make that a breeze. We can do Apache, but I love Nginx for its simplicity, we will be installing and configuring one for this setup.
From your SSH accessed server terminal run the below command to update the installed packages:
sudo apt update && sudo apt upgrade
After that, you can install Nginx with:
sudo apt install nginx
A successful installation will give you:

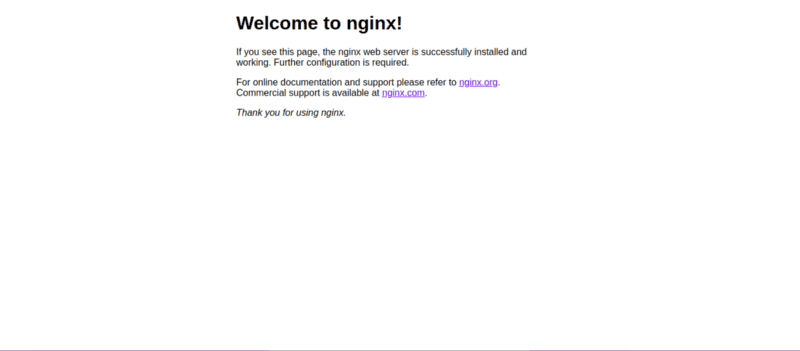
Visiting the static IP attached to this instance gives the default welcome page for a successful Nginx installation. Awesomeness!!!
Nginx configuration for NodeJs server routing
To ensure that requests are passed to your NodeJS app, you need to have the default Nginx configuration block point to your the local URL of the app.
We will begin this by configuring our Nginx webserver.
Changing directory to nginx installation directory with: cd /etc/nginx/ In the sites-available directory, copy the default config file to default.bak using sudo cp default default.bak, then use sudo nano ./sites-available/default to edit the content of the file.
Here is a configuration that receives a normal request from the client then transfer it to the node server we have set up above.
server {server_name SERVER_NAME_OR_STATIC_IP;location = /favicon.ico {log_not_found off;access_log off;}location = /robots.txt {allow all;log_not_found off;access_log off;}location / {proxy_pass http://localhost:3000;proxy_http_version 1.1;proxy_set_header Upgrade $http_upgrade;proxy_set_header Connection 'upgrade';proxy_set_header Host $host;proxy_set_header X-Real-IP $remote_addr;proxy_cache_bypass $http_upgrade;}access_log /var/log/nginx/dkapi-access.log;error_log /var/log/nginx/dkapi-error.log error;}
Change the SERVER_NAME_OR_STATIC_IP to your server name that points to the static IP, or just use the Lightsail server static IP.
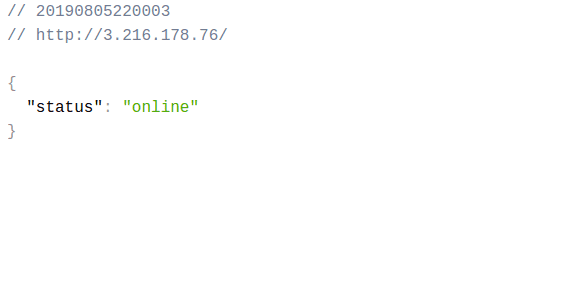
If all went well, visiting the server name or static IP should yield the default response for our app. Mine:
Adding free SSL by letsencrypt
Sometimes, accessing our NodeJS app using normal unsecured HTTP would throw a warning screen or will not resolve. This is a security feature implemented by web browsers and hosting providers. To this, I always install SSL for nginx servers. We will be doing a setup with let’s encrypt as generally done.
Run the below command to install certbot package.
apt-get install software-properties-commonadd-apt-repository ppa:certbot/certbotapt-get updateapt-get install python-certbot-nginx
To set up an SSL for your domain, you can do:
certbot --nginx
It will check the CN (common name) in the existing Nginx configuration file, if not found then it will prompt you to enter the domain name.
Certbot automation is smart! It will take care of all the necessary configurations to make your Nginx ready to serve over https.
Not so fast, but we now have SSL support for our nginx web server at the specified domain name.
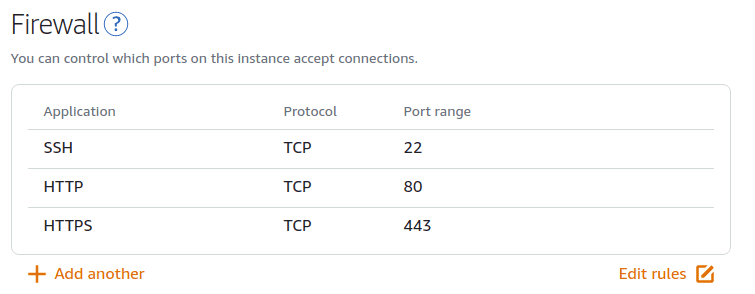
To allow HTTPS requests to come through into the VPS instance, you have to modify the firewall from the Network tab on the instance dashboard. Click on Add another, select HTTPS, then click on the green tick.
It should look something like this:
And that’s it! Full HTTPS support without an extra.
Taking things further
If you have a build process and a Continous Integration, you should be thinking of setting it up. This would protect against the round trip of pulling and restarting our app on the server.
I assume that the project has been set up on CircleCI already using a Github account. Let’s move forward.
f you notice from the bottom page of the Lightsail server instance dashboard Connect tab, it states, “You configured this instance to use id_rsa (key_region) key pair.” This is a secret SSH key and can be managed from https://lightsail.aws.amazon.com/ls/webapp/account/keys.
The keys from the page above are private keys whose public keys are included in instance setups. Lucky enough, it has been included in my own setup and it is what CircleCI is requesting to access my server remotely. It is not included in the authorised_keys of the user account that you have created, you are to add the public key in there.
To get the content of the file, firstly download the ssh key attached to the instance, next use cat command to show the content of the file. In my own case:
cat LightsailDefaultKey-us-east-1.pem
On the project page in CircleCI dashboard, click the settings icon close to the project, then SSH Permissions. Click on the blue Add SSH Key button enter the domain name for the key, then paste the copy private key into the Private key input, click the light blue Add SSH Key button to complete the process.
New user accounts do not come with the private ssh configured, we have to manually add this ourselves. To do this, we can generate a public key from the downloaded private key using:
ssh-keygen -y -f ~/.ssh/lightsail.pem > ~/.ssh/lightsail.pem.pub
Then you can copy the content of ~/.ssh/lightsail.pem.pub to the authorized_keys file of the account for your app. Simply:
su — dkapisudo nano ~/.ssh/authorized_keys
Paste the copied public key into the file, then Ctrl + X to save.
Below is the CircleCI config for my own project, yours might be different. The important part here is the command section.
version: 2jobs:staging:docker:- image: circleci/node:10steps:- run:name: Deploy APIcommand: ssh -o "StrictHostKeyChecking no" api@staging.datingkinky.com "cd ~/app; git pull; yarn install --production; sudo systemctl restart dkapi"workflows:version: 2staging:jobs:- staging:filters:branches:only: develop
The emphasis is on this:
ssh -o "StrictHostKeyChecking no" dkapi@staging.datingkinky.com "cd ~/app; git pull; yarn install --production; sudo systemctl restart dkapi"
To note from the above command:
dkapi@staging.datingkinky.com: We want to connect to the instance but as thedkapiuser we created.cd ~/app: Change directory to the app directory we pulled the code into.git pull: Pull the code from Github to keep the code updatedyarn install — production: Install dependencies that might have just been included.sudo systemctl restart dkapi: Restarts thedkapiservice running the NodeJS app in the background usingsystemdservice
A perfect process right?
Push a new code, let CircleCI do your deployment and restarting the node app for you. Sooo cool!!!
Beautiful? Not yet!
Gotcha
I ran into a failing build, which is a result of the systemctl command. The error states
no tty present and no askpass program specified
Basically, we have to bypass systemctl asking for password whenever we run it from a trusted machine. I found the solution from Stackoverflow.
Now, we have to ssh as a root user, then run:
sudo visudo
The command will pop a file for editing, it is a delicate file that can mar all the effort we have put into the setup. What we have to do in here is to go to the end of the file to add:
dkapi ALL = NOPASSWD: /bin/systemctl
Replace dkapi with the user you created in for deployment.
Use Ctrl+X to exit the file. Then, we can rerun the failed CircleCI workflow or push a new code to test the setup.
It ran successfully in my own case, I believe yours too would have been successful.
Awesome!!!
Highlights
- Spinup a Lightsail instance
- Add a static IP to the instance
- Allow SSH access from a local machine
- Installing NodeJS
- Installing MongoDB
- Adding a new user account for deployment
- Creating ssh key for Github access
- Pulling the NodeJS repo from Github
- Running NodeJS app in the background
- Installing Nginx webserver
- Nginx configuration for NodeJS server routing
- Adding free SSL by letsencrypt
- Integrate CircleCI
- CircleCI integration gotcha
Conclusion
Following through this post, we have configured a non-existent AWS Lightsail server instance to run a NodeJS app. We have been able to set up the code to run a systemd service for the app to be able to run in the background.
We added SSL and then finalized the setup with a CircleCI integration and a fix to a known error that could cause the build process to fail.
I will like to learn if there is any part that could be improved, know about a bug that stops your own setup and learn more about the AWS Lightsail Servers.
Thank you for reading. I appreciate your patience!!!
Edit on githubTweet